Learning Goals
- How do I document and enrich my data catalog?
- How do I populate custom fields on tables/columns in bulk?
- How do I populate custom fields from a spreadsheet?
- How do I populate custom fields from a script?
Step 1 - Set Individual Custom Field Values Manually
- Navigate to the Explorer tab
- Open the UAT - Snowflake Data Warehouse
- Go to the Schemas tab
- Open the RAW schema
- Go to the Tables tab
- Open your specific table
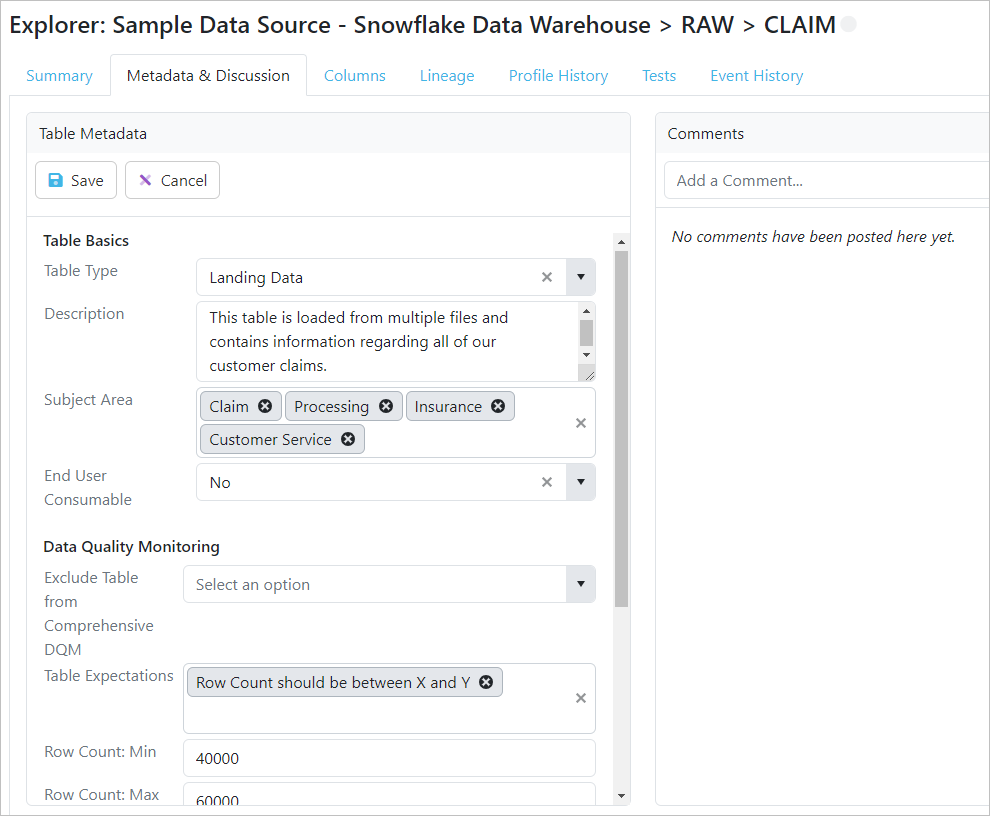
- Go to the Metadata & Discussion tab
- Fill out the following fields:
- Table Type = Landing Data
- Description = "This table is loaded from multiple files and contains information regarding all of our ..."
- Subject Area = Select some relevant subject areas
- End User Consumable = Decide on whether you think this table should be consumed by end users?
- Table Expectations = Row Count should be between X and Y
- Row Count: Min = some numeric value
- Row Count: Max = a larger numeric value
- Business Data Steward = yourself
- Technical Data Steward = someone else in the class
- Click Save

Step 2 - Set Multiple Custom Field Values with Bulk Edit
- Open the Columns tab of your table
- Highlight all the columns that end in "_ID"
- Click Bulk Edit and set Column Role to "Business Key"
- Click Save
- Highlight all of the Created_, Modified_, and Source_ columns
- Click Bulk Edit and set Column Role to "System Generated Metadata"
- Click Save
- Highlight all of the other columns
- Click Bulk Edit and set Column Role to "Attribute"
- Click Save
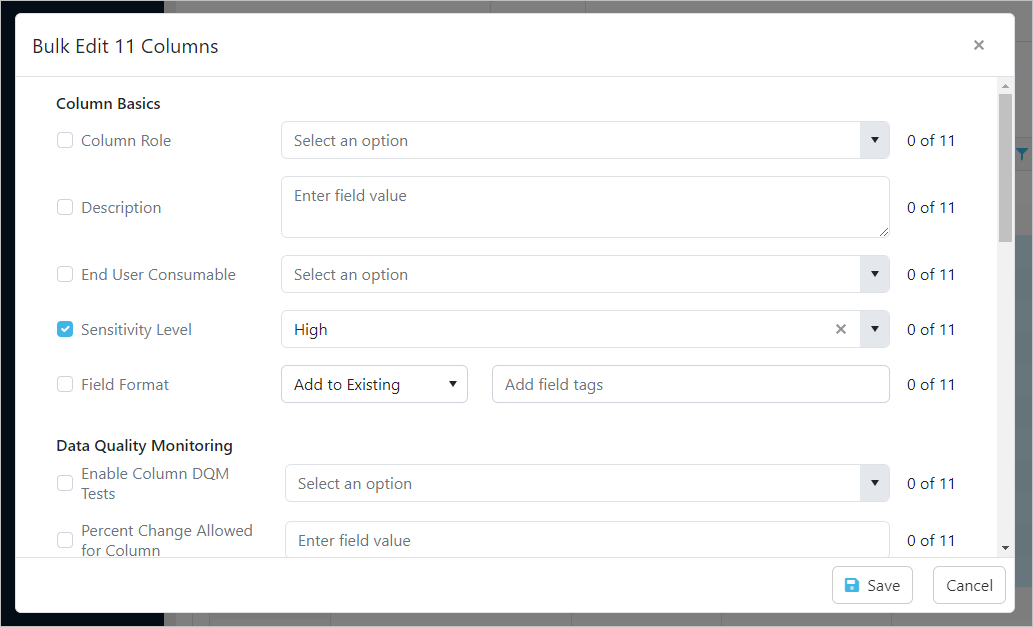
- Highlight all of the columns with identifiable information like Name, Address, Street, Email, Phone etc.
- Click Bulk Edit and set Sensitivity Level to "High"
- Click Save
