Learning Goals
- How do I apply a test at scale?
- What is a Validatar Template test?
- What does metadata driven mean?
- How do I make child tests differ from each other?
- How do I use the Template Builder?
Step 1 - Copy and Convert a Standard Test to a Template
- Open the Row Count Test from Exercise 5
- Copy the test
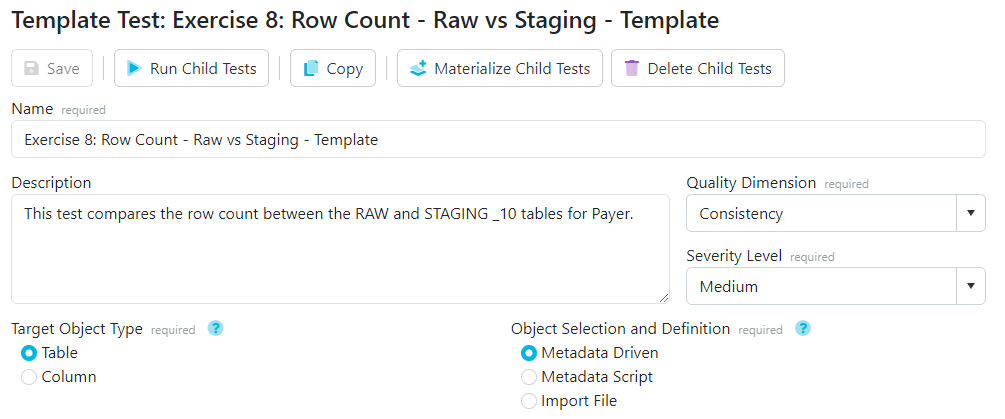
- Convert to Template Test
Step 2 - Review and Update Template Test Structure
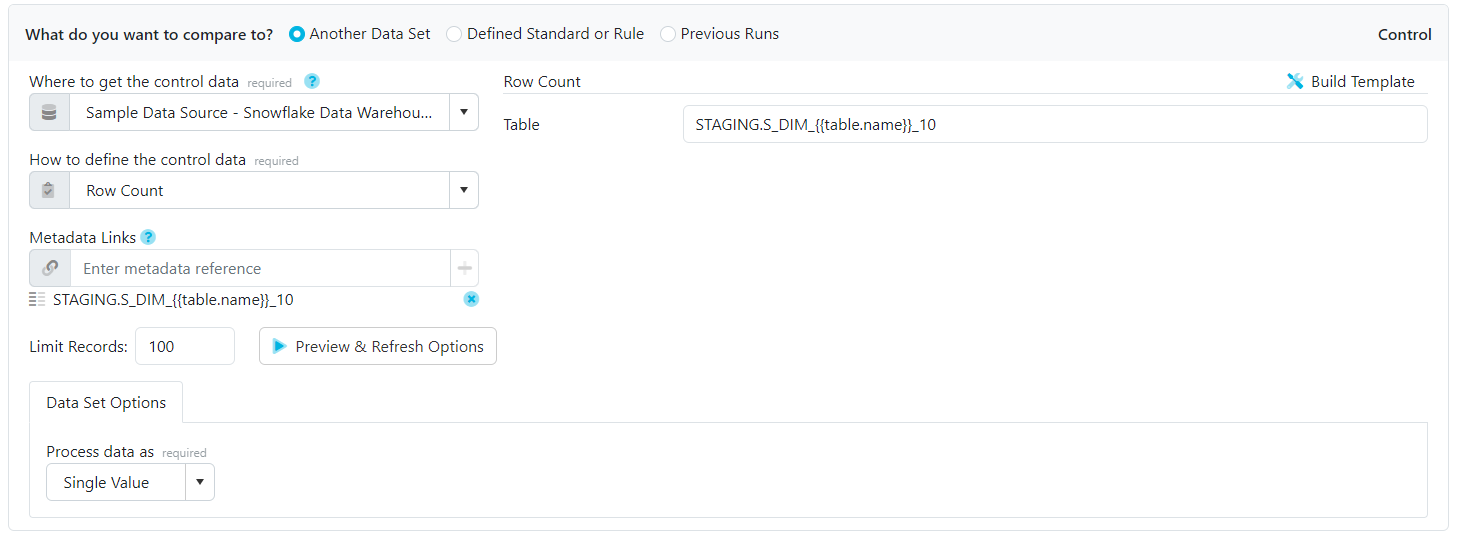
- Review what parts of the Standard Test have been replaced by {{schema.name}} and {{table.name}} placeholders.
- Update the Compare to Table from STAGING.S_DIM_PAYER_10 to STAGING.S_DIM_{{table.name}}_10
- Update the metadata link to STAGING.S_DIM_{{table.name}}_10
Step 3 - Add other RAW tables to the Metadata Selection
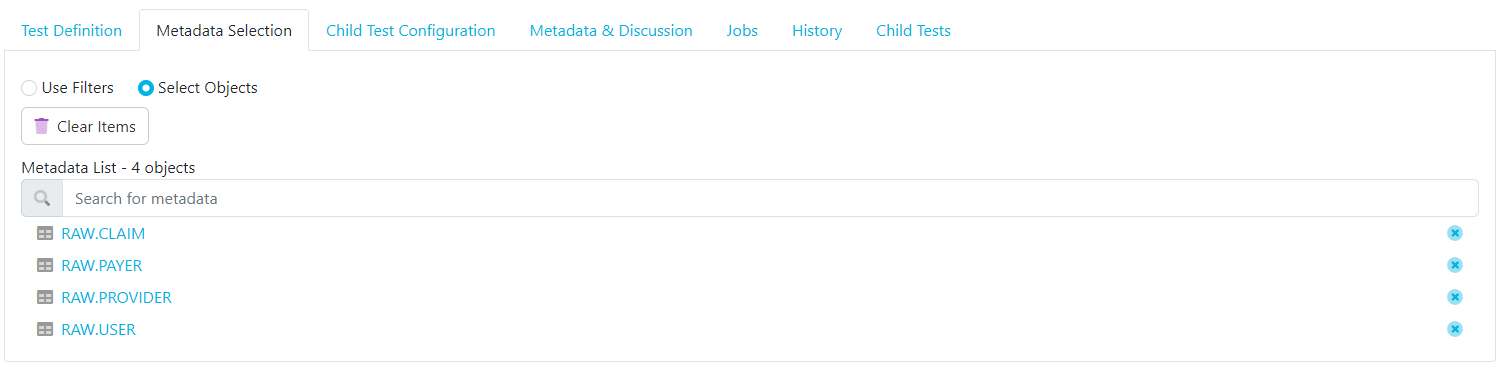
- Go to the Metadata Selection tab
- Add additional Tables that follow the same pattern and should have their row counts check similarly
- Save your test
Step 4 - Materialize Child Tests and then Run
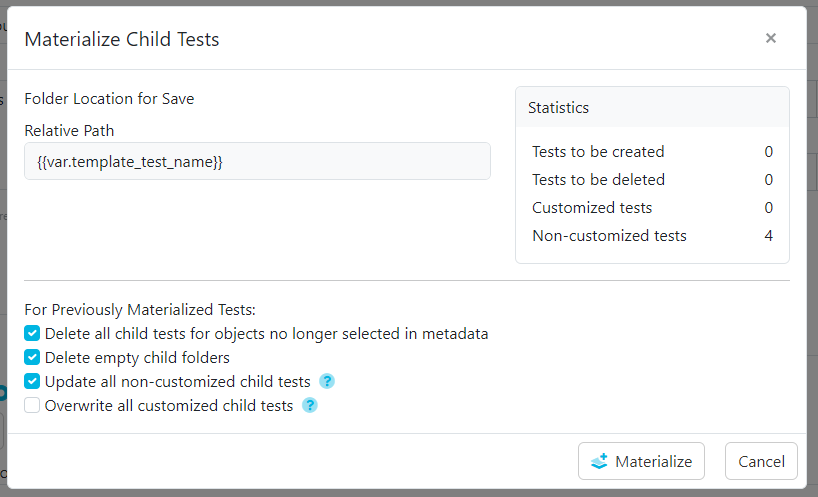
- Click Materialize Child Tests
- Confirm the counts make sense
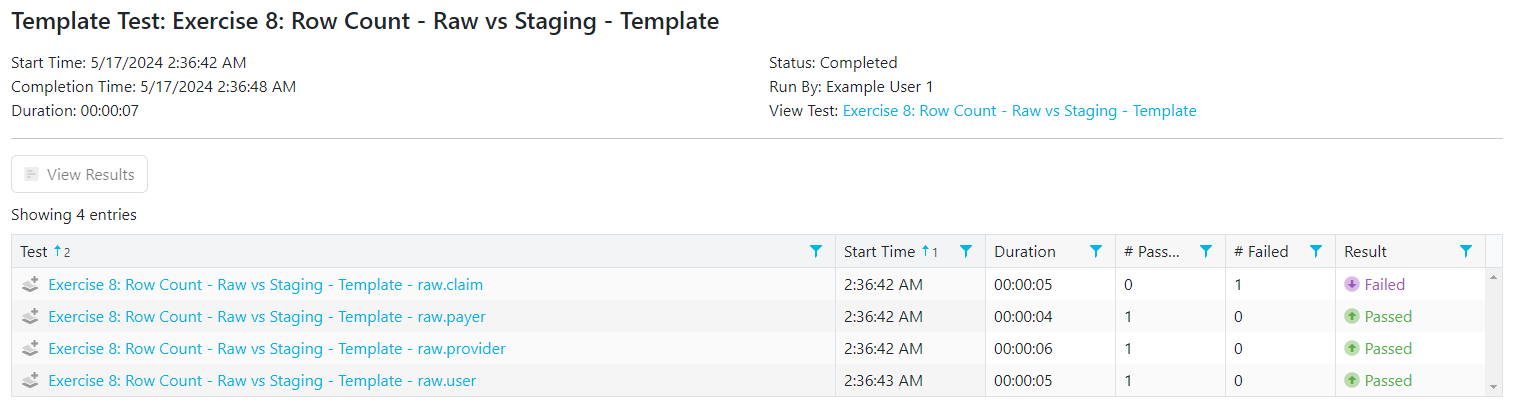
- Run Child Tests and see all your individual tables get tested using the same pattern
Tips About Validatar
- Converting a Standard Test to a Template Test helps the user understand the template framework.
- Metadata selection is how to choose which objects this template applies to.
- Materializing Child Tests is simply creating or updating tests created from a Template.