Overview
The export feature allows selected tests, template tests, profile sets, and jobs in a particular project to be exported to an XML file. The XML file can then be used to import the contents into another project.
A user may want to export Validatar objects to:
- Create a backup of a Validatar project
- Make mass changes to the contents of a test or job
- Duplicate tests or jobs for use in a different development environment (e.g. Running the same set of tests configured against the DEV environment to the TEST environment).
There are two ways to export Validatar objects
- via Folder path selection
- via Label selection (requires the project to have at least one locked label)
Exporting via Folder Path Selection
Exporting via folder path selection allows you to select available objects based on their hierarchical location in Validatar. Expand and collapse tests, jobs, and folders to show or hide certain objects.
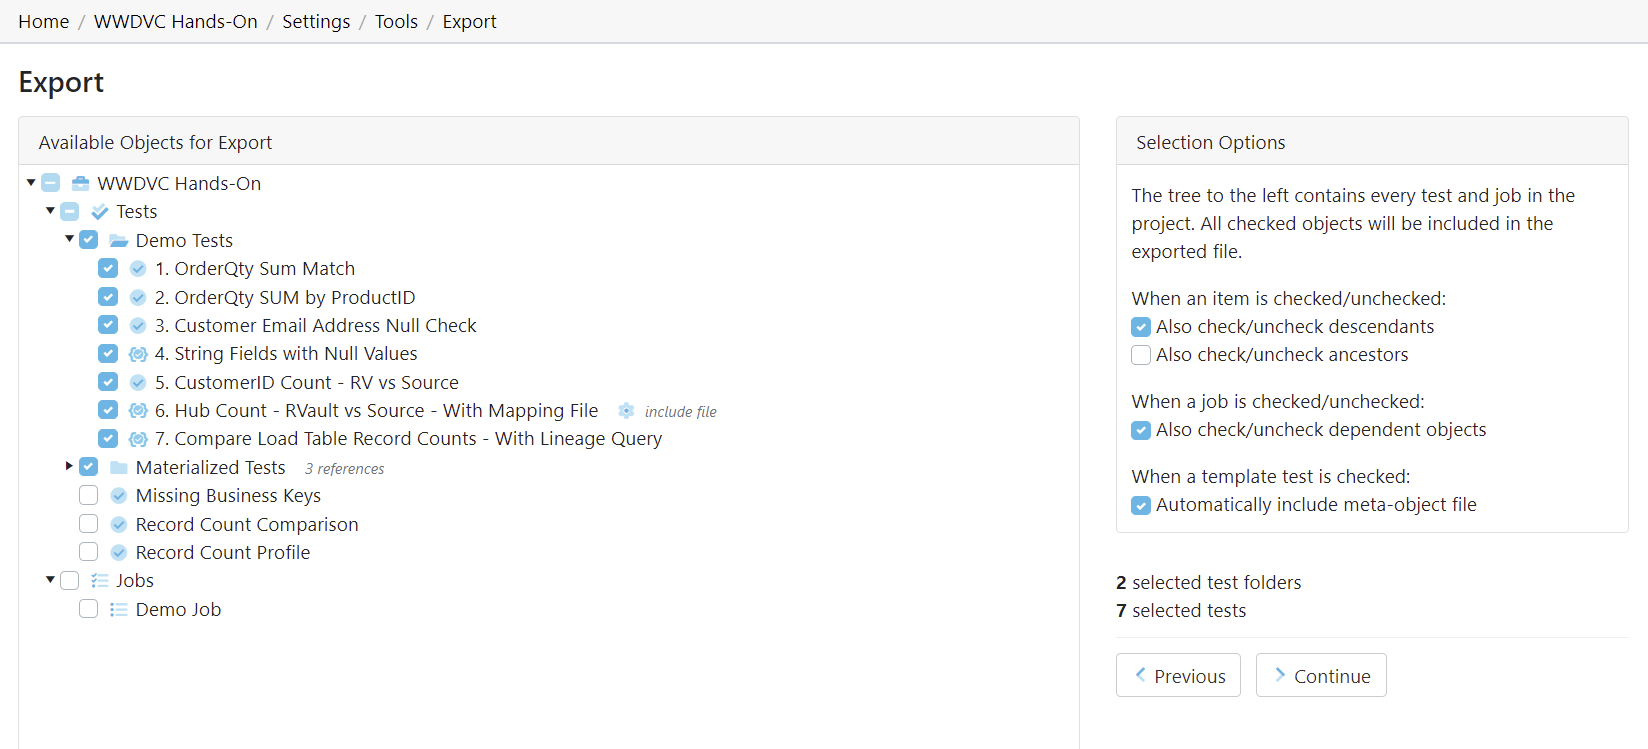
Selection Options
Every object that is checked on the Available Objects for Export list will be included in the exported XML file. You can configure how the object selection should work using the section called Selection Options.
When an item is checked and unchecked choose to:
- Check and uncheck descendants. This allows all the children objects inside of folders to be selected or deselected for export.
- Check and uncheck ancestors. This allows all the parent objects of the item to be selected or deselected for export.
When a job is checked and unchecked choose to:
- Check and uncheck dependent objects. This allows the objects within a job to be selected or deselected for export. Learn more about dependent job configuration in the next section.
When a template test is checked choose to:
- Automatically include the meta-object file. Checking this option ensures the import file is included with the template test if the template test is driven by an import file.
Job Configuration
When Also check/uncheck dependent objects for a job is selected, each job that is selected in the folder tree will have a configuration icon appear next to the job name so the user can choose which dependent objects of the job should be included in the export. Selecting the configuration icon opens the following window.
If you choose to remove an item from the item list one of two things may happen when it's time to import the file:
- If an item name with the same hierarchy of the removed item name is found in the target project, the job step will be linked to that item.
- If an item name is not found, the job step will be removed from the job upon import.
Learn more about the last export step in the Finalizing the Export section below.
Exporting via Label Selection
Exporting via label selection allows you to select all objects related to locked labels associated with tests, template tests, or jobs. Only locked labels will show up on the export list and multiple labels can be selected for export at once.
To view the configuration of the locked label, select the external view icon to the right of the label name.
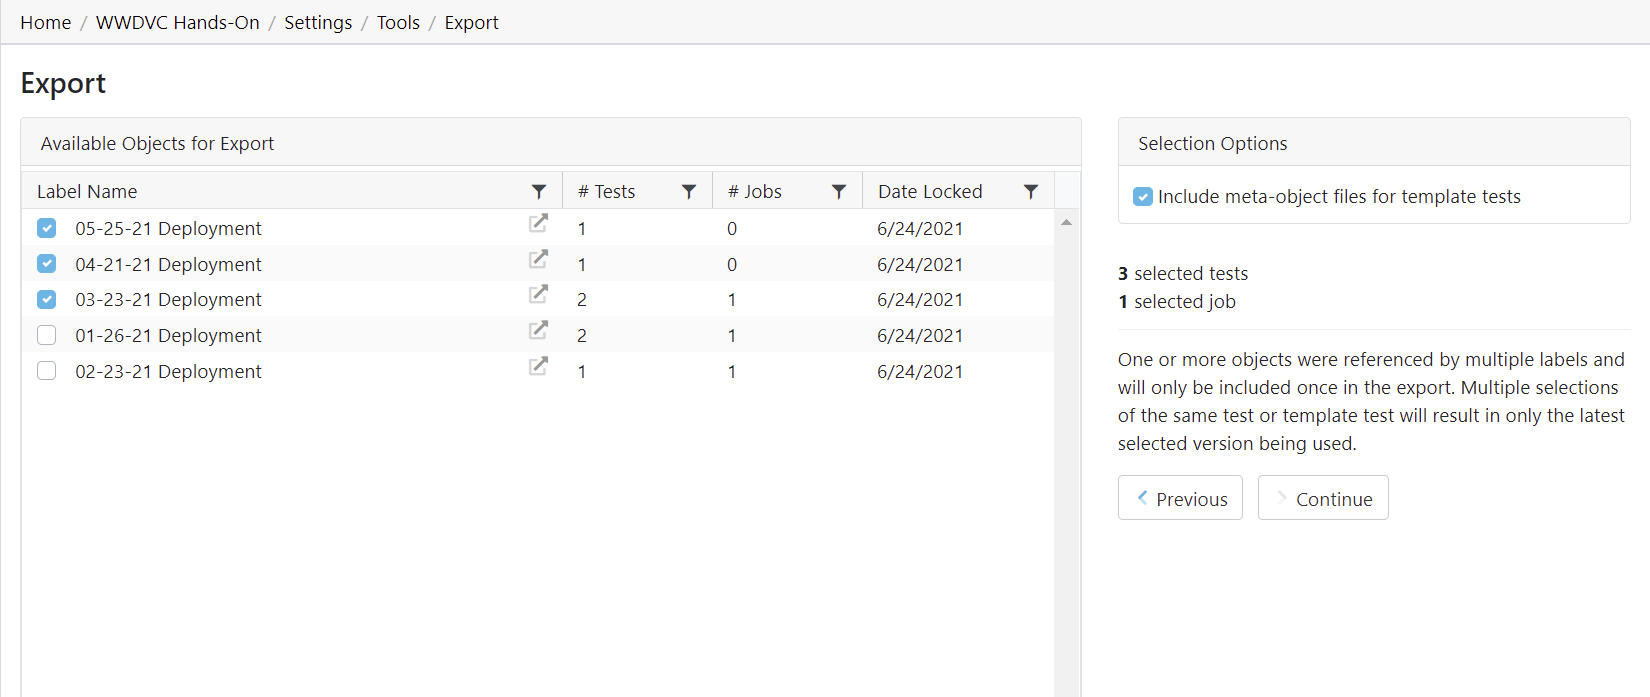
Selection Options
The selection options include an aggregate of how many tests and jobs will be included in the export as the labels are selected on the available objects pane.
If a test, template test, or job is referenced by multiple selected labels, the object will only be included in the export once. If multiple versions of the same test or template test are selected, only the latest selected version will be used.
When checked, the Include meta-object files for template tests option includes the import file that drives the respective template test.
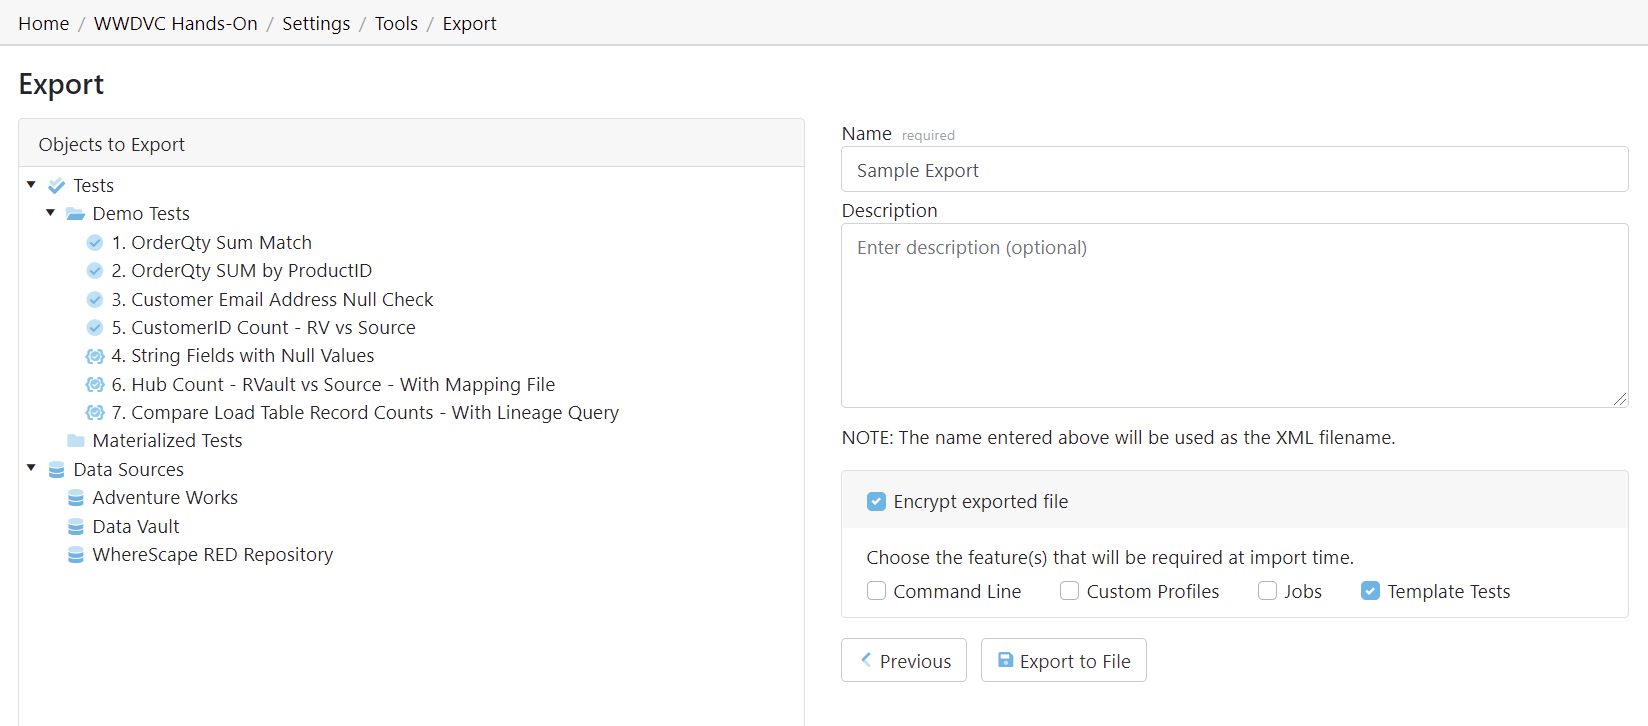
Finalizing the Export
The final step of the export includes adding a name and description (optional) to the exported XML file. You will also see a folder tree of all of the objects that will be included in the export file. This includes tests, folders, template tests, jobs, profile sets, and data sources.
Upon export, the file will be automatically downloaded and can be found in your Downloads folder. The destination of the export file cannot be changed.