Overview
Validatar supports Single Sign-On (SSO) using Azure Active Directory as the Identity Provider. The following steps show how to setup and configure Azure AD as an SSO Provider within Validatar.
Create a new application
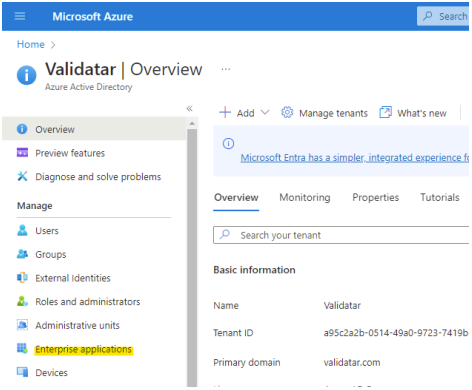
Within the Azure Portal, select Enterprise applications under your Active Directory dashboard.

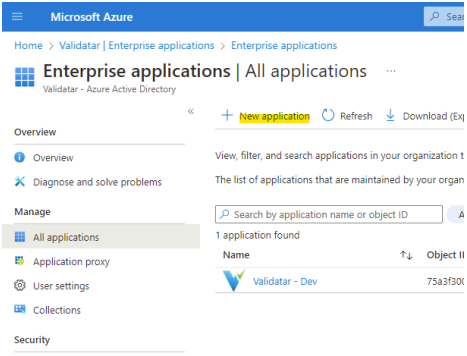
Click New application.

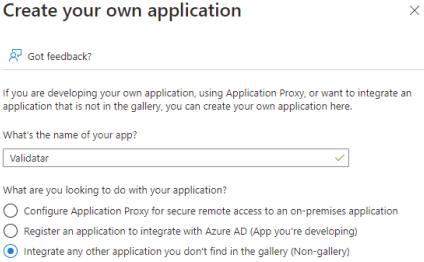
Select Create your own application. On the dialog pop-up, set the name to Validatar
and click Create.

Set up Single Sign-On
Under the application page, navigate to the Single sign-on tab. Select SAML as the single sign-on method.
.png)
Open a separate browser tab and navigate to the Settings > Configuration > SSO Providers page in Validatar. Click Add Provider, then enter a name for the SSO provider.
Switch back to the Azure browser tab and edit the Basic SAML Configuration.
Identifier (Entity ID): Enter a unique identifier (no spaces), which is typically formatted as a URL (i.e. https://sso-demo.validatar.com). Note that this does not have to be an actual URL. Copy this value to the SP Entity ID field in the Metadata section of the Validatar browser tab.
Reply URL: Enter the value from the SSO Endpoint URL in the General section of the Validatar browser tab.
Azure browser tab:
.png)
Validatar browser tab:
.png)
Once these fields are filled out, save the configuration in Azure.
Using the values from the Attributes & Claims section of the Azure browser tab, complete the fields in the Attributes section of the Validatar browser tab.
The Unique User Identifier is the claim that will be mapped using the Name ID Format configured in Validatar.
The EmailAddress format maps the name identifier from Azure AD (as an email address) to the email address of a user in your Validatar instance. This will also populate the username with the email address.
The Persistent format maps the name identifier from Azure AD to the username of a Validatar user. When using a persistent format, Azure AD also needs to provide an attribute to be used for the email address of a user in Validatar, which should be entered into the Email Attribute Name field.
When copying claim names from the Azure browser tab, be sure to copy the full name, including the namespace. For example: http://schemas.xmlsoap.org/ws/2005/05/identity/claims/givenname
Azure browser tab:
.png)
Validatar browser tab:
.png)
In the Azure browser tab, return to the Single sign-on configuration page. Under the SAML Certificates section, download the Base64 certificate. Open the certificate using a text editor and copy the contents into the IDP Certificate textbox in the Signing section of the Validatar browser tab.
Azure browser tab:
.png)
Validatar browser tab:
.png)
In the Azure browser tab, click Edit on the Token signing certificate section and make sure the signing algorithm dropdown matches the Signing Algorithm selected in Validatar.
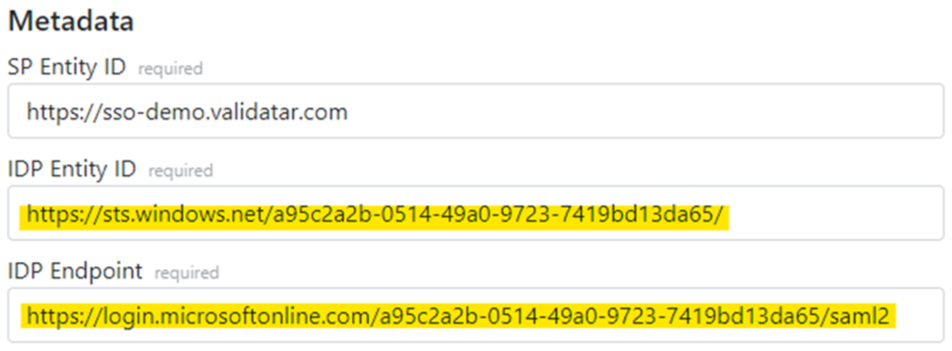
Under the Set up <name> section in the Azure browser tab, copy the following values to the corresponding textboxes in the Validatar browser tab:
The Login URL to the IDP Endpoint field
The Microsoft Entra Identifier (previously known as the Azure AD Identifier) to the IDP Entity ID field
Azure browser tab:

Validatar browser tab:

In Validatar, choose the Initial User Groups that should be assigned to auto-created users.
Click the Save button in Validatar to save your changes to the SSO Provider. At this point, you should be able to test the SSO configuration by logging out of Validatar and clicking the Sign in with SSO link at the bottom of the login page.