Overview
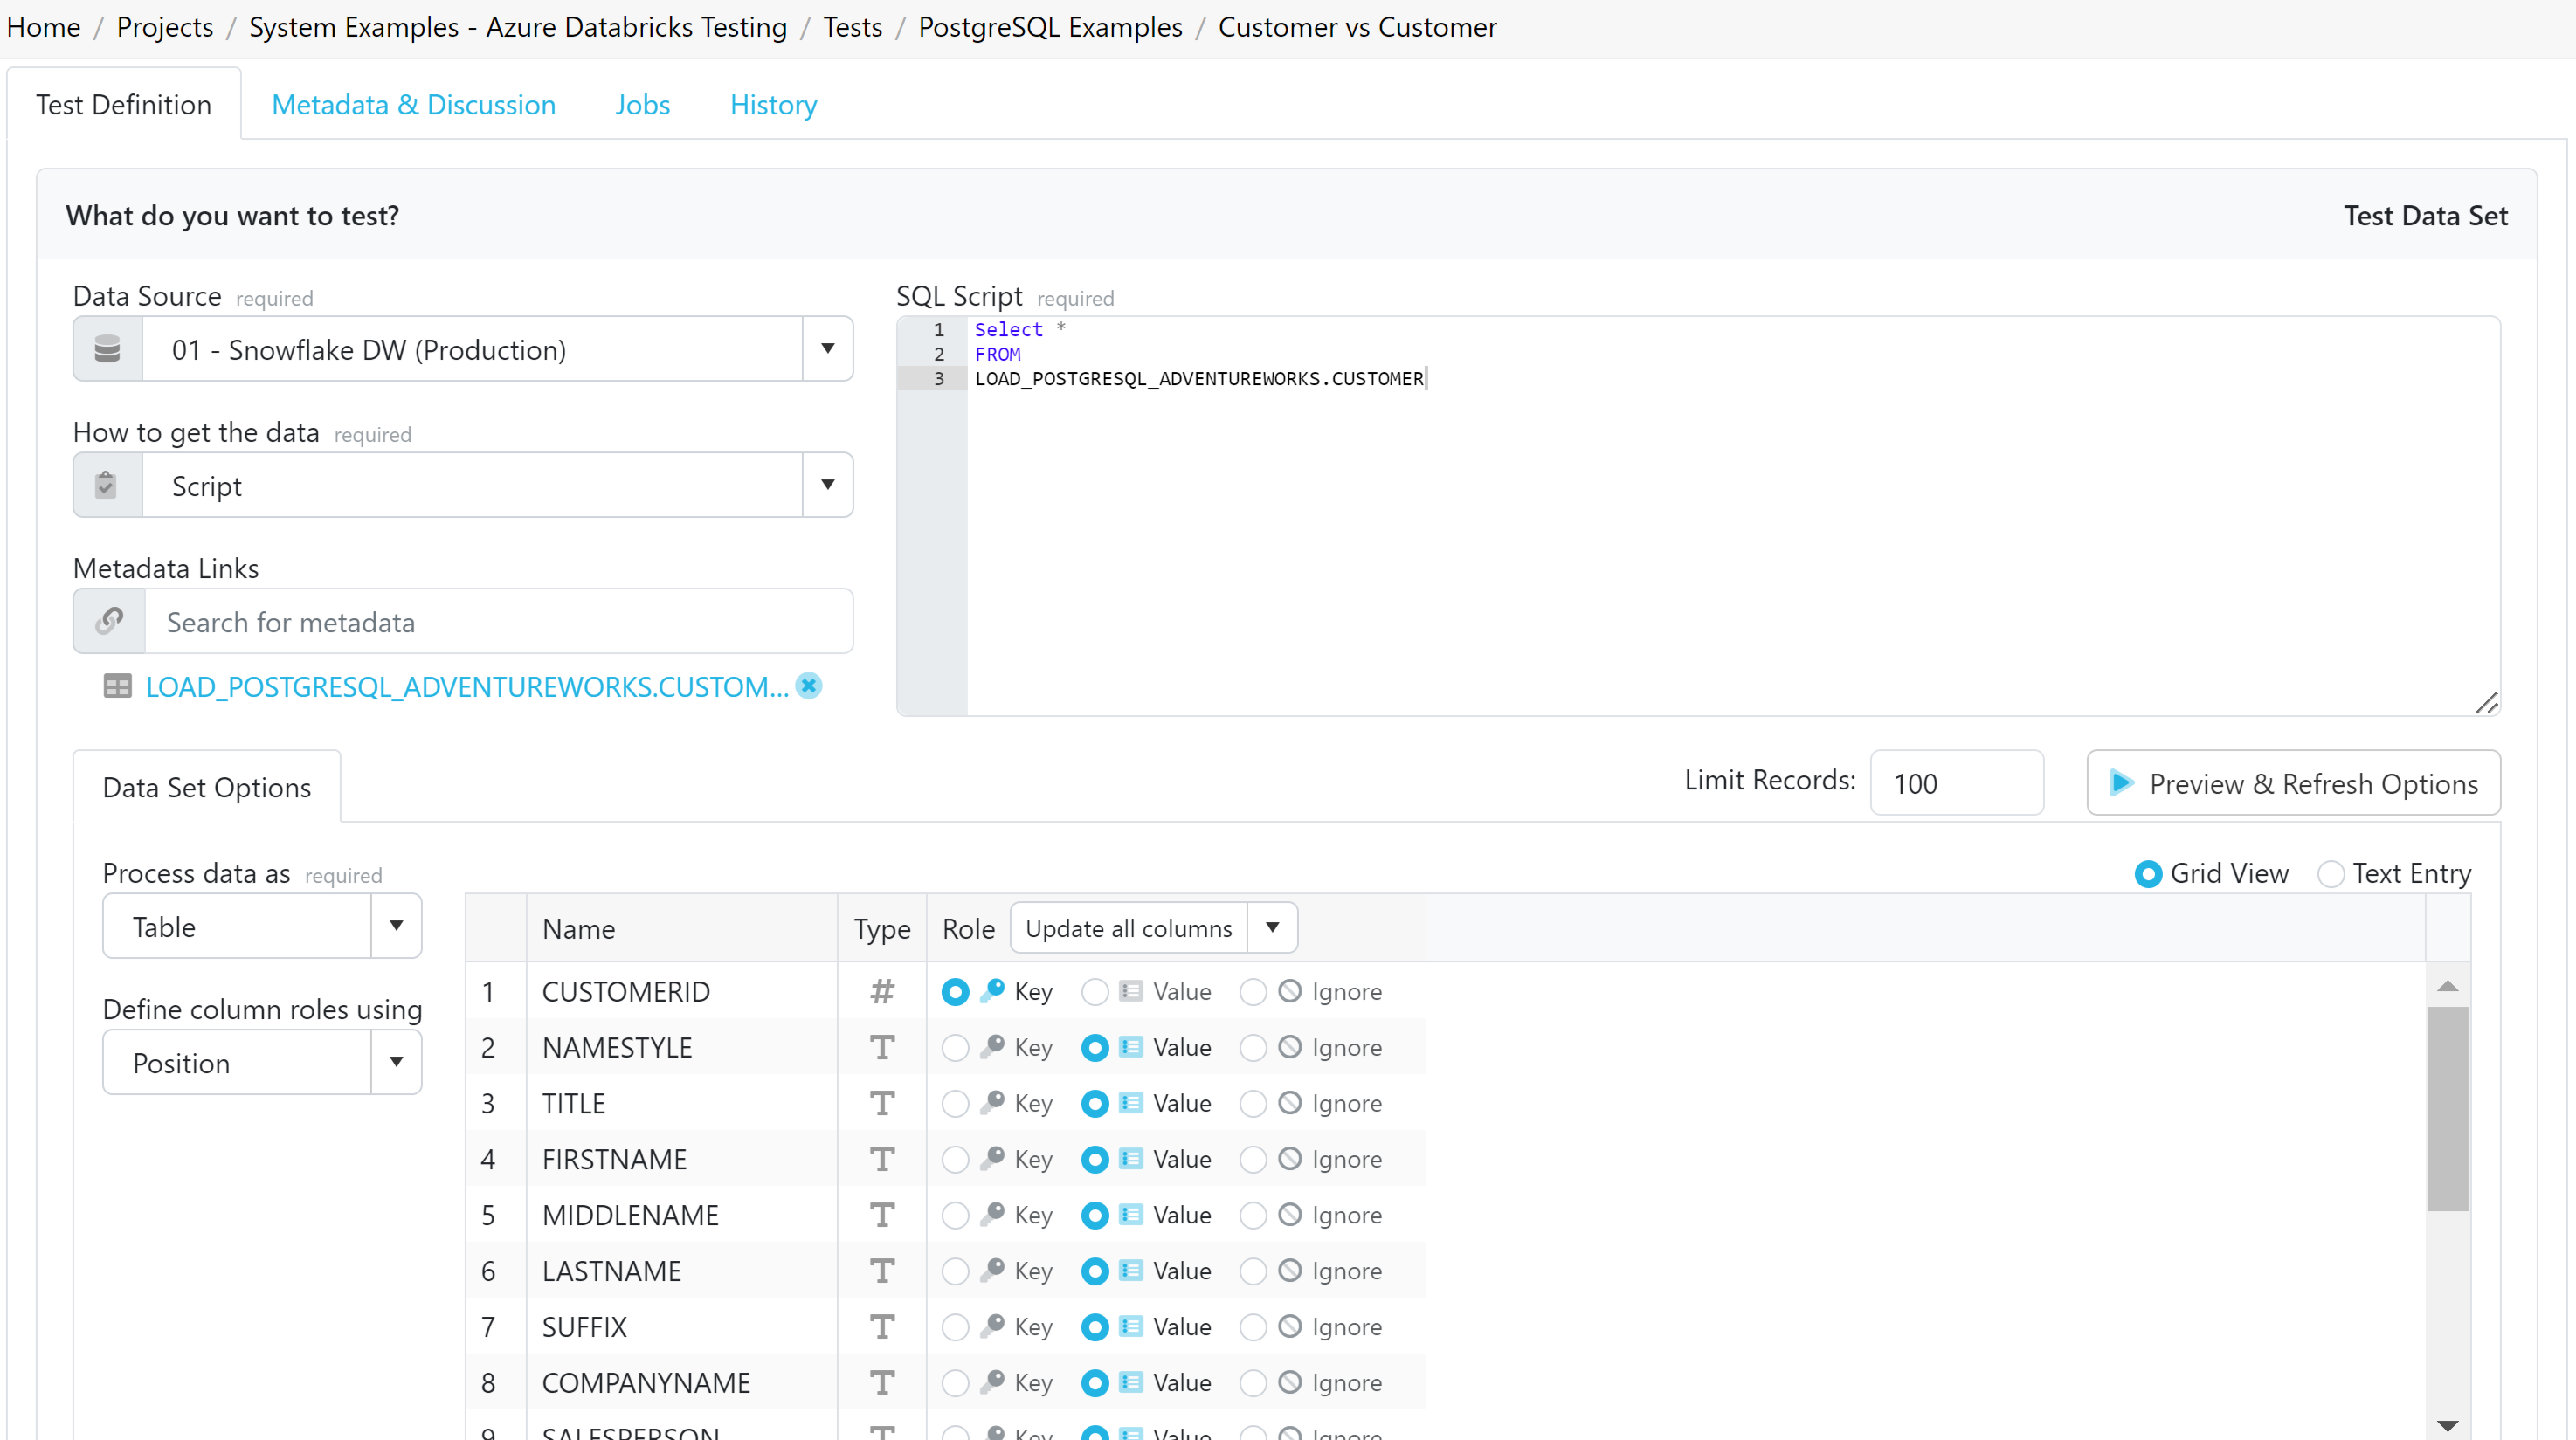
In Validatar, the Test Data Set is the first section you must configure in a test and allows you to validate and find potential problems in your data. The configuration process involves specifying your data source, how to retrieve the data, and how to process the returned data.

This article will guide you through the process of configuring your Test Data Set. For help configuring the Control section, please use the following articles:
Comparing to Another Data Set
Comparing to a Defined Rule
Comparing to Previous Runs
The Test Data Set configuration in Validatar is used for validating and identifying potential problems in your data. To configure your Test Data Set, you need to specify a data source and decide how to retrieve and process the data.
1. Choosing Your Data Source
A critical first step in configuring the Test Data Set is defining the data source from where the data will be pulled. Use the dropdown to select your Data Source. Only data sources that are enabled for the Project and that you have permission to write tests against will be available.
2. Retrieving Your Data
Once the data source is defined, you must decide how to retrieve the data. Validatar offers two methods for this:
Script - This method allows you to write a SQL or Python script to pull data.
Profile Result - This method uses profiling information that Validatar has about the selected data source.
You can also attach Metadata Links to connect the metadata to the test, for enhanced automation and comprehensive testing.
3. Processing Returned Data
After determining how to pull data, it's time to configure how to process the data returned. Here are the three methods to process the data when it comes through via a script:
Table - In this method, you validate the entire table column by column. You can specify which columns are key columns (providing uniqueness) or value columns (the data to validate). If needed, you can opt to ignore a column in the test. You can view these options in a grid or through text.
Column Aggregation - This method allows you to select one column from the table for aggregation to perform the comparison.
Row Count - This method retrieves the record count from the data returned.
4. Preview & Refresh Options
Finally, you can Preview & Refresh Options to preview the data structure that will be returned when you perform the test. This will open another tab that lets you preview those results.
Viewing Messages and Files
You can view information and error messages that come from the standard output of the query after initializing or refreshing the test data set options. The print messages can be used for debugging and troubleshooting. Files that are saved from Python executions are also shown here.
Conclusion
Knowing how to correctly set up your Test Data Set in Validatar and understanding the associated options is the first step of configuring a test and key to effective data validation. With the right configuration, you can unlock the full potential of Validatar testing.