Adding Labels to an Object
No matter if you're adding a label to a standard test, template test, or job, there's a label button in the upper-right corner of the configuration screen that will open a pop-up window to add the label(s).

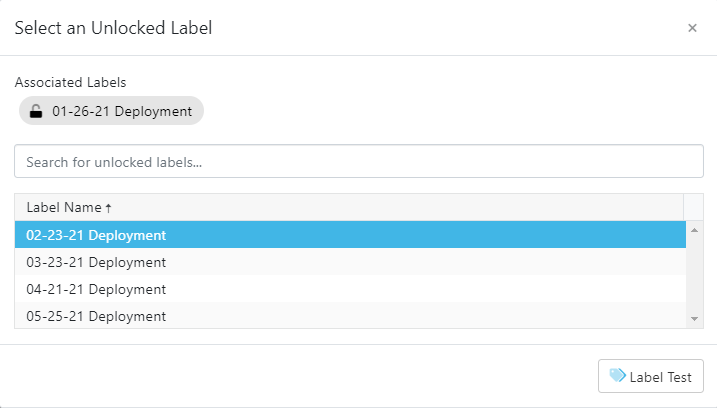
Once you click the Label button, the project's unlocked labels will appear in a list. Next, you can choose to add one or more labels to that object by selecting the row. Any label already associated with the object will be pinned at the top of the window and not appear in the list. After selecting the relevant labels, click the Label Test button.
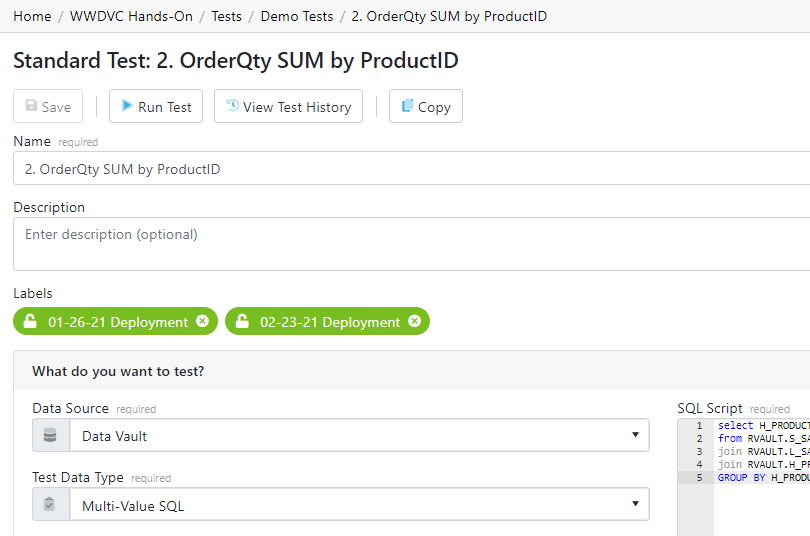
After adding a label, a Labels area will appear under the Description box and list the associated labels. Click on a label to view the label details.

All unlocked labels are highlighted in green. If a label is locked after being added to an object, the label highlight becomes blue.
Removing Labels
To remove a label from the object, navigate to the object detail page and click the x on the label. Note that only unlocked labels can be removed.
Learn about exporting Validatar objects by a label on the Export page.