Overview
A Snowflake data processing engine processes your data quality tests directly within your Snowflake account and stores the results there. Only the summary result of each comparison is sent back to the Validatar web server. Data retrieved by a data agent from databases outside of Snowflake is pushed directly into Snowflake for comparison.
Note: The Snowflake data processing engine is a licensed feature. Contact your Validatar account representative if you don't see Snowflake as an option when creating a new engine.
Navigate to the Settings > Data Processing Engines page, click the New Engine button, enter a name for the new engine, and complete the following three steps.
Step 1: Configure Connection
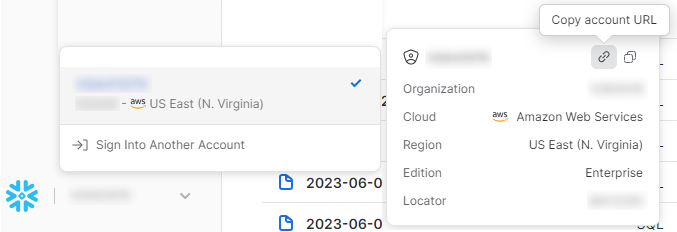
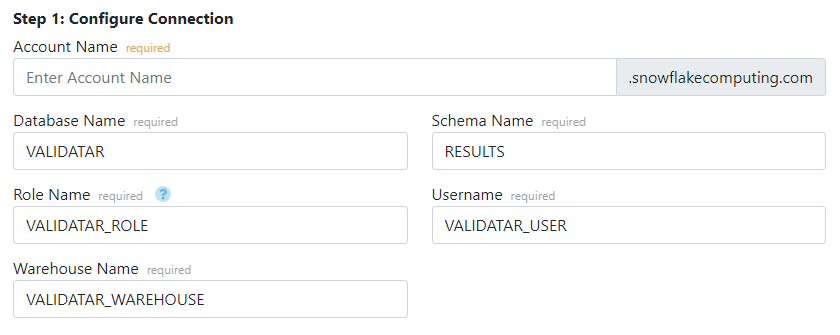
To complete this step, you will first need to retrieve your Snowflake account name by logging into your Snowflake console. Identify your Snowflake account URL by clicking the menu at the bottom left, then clicking the link icon to copy your account URL, which should look something like this: https://<locator>.<region>.snowflakecomputing.com. Enter the highlighted text as the Account Name in Validatar.
You can either use the predefined values for the remaining fields or customize as needed. Once you've completed this section, click the Save button at the top to create the data processing engine, then continue with the next step.
Step 2: Configure Snowflake
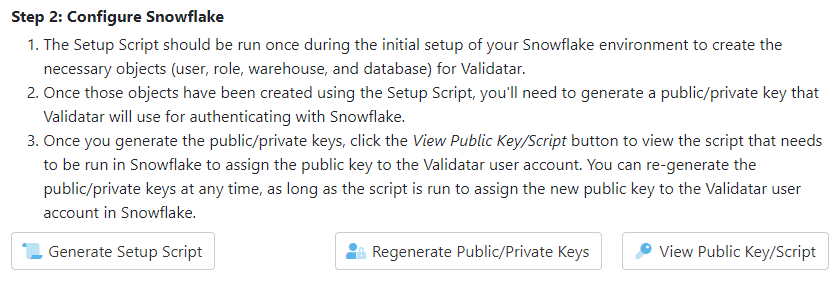
Once the engine has been created, you'll need to configure your Snowflake environment so that it can be used by Validatar.
- First click the "Generate Setup Script" button to open a pop-up with the initial setup script to create the database, schema, role, user, and warehouse objects if they do not already exist in your Snowflake account. Copy this script and paste it in your Snowflake console, then execute it using a role that has been granted access to the securityadmin and sysadmin system roles. NOTE: Make sure to replace the [[REPLACE]] placeholder text in the script with the value you want to use for the new user's password.
- Once you have run the setup script, click the "View Public Key/Script" button to open a pop-up with the script that attaches a public key to the new user that was created in the prior script. Copy this script and paste it in your Snowflake console, then execute it using a role that has been granted access to the securityadmin system role. Validatar authenticates to Snowflake using the private key stored securely within the Validatar repository database.
Note: Currently Validatar only supports authenticating to Snowflake for Data Processing Engines using Key Pair authentication with encrypted private keys. You can easily rotate your keys within the Validatar UI.
Step 3: Validate Connection
Now that your Snowflake environment has been configured, the final step is to verify that Validatar can connect to it. Click the "Validate Settings" button to perform the steps listed below.
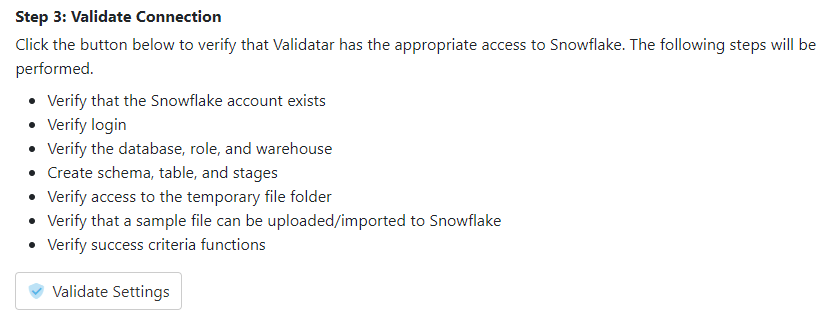
Once Validatar can successfully perform all of these steps, you'll be able to start using your new data processing engine by assigning data sources to it.