Learning Goals
- How do I connect to a CSV file?
- How do I check for uniqueness in multiple CSV files?
- How do I configure a template test to use some string replacement functions?
- How do I configure Dynamic Column Role definitions?
- How do I import a test from the Marketplace?
Step 1 - Import "Exercise 10: account_id is unique in account_data.csv" from Marketplace
- Open the Marketplace in the top banner
- Search for Exercise 10
- Click on the "Exercise 10: account_id is unique in account_data.csv" Card

- Click on the "Get" button
- Select "Import Directly"
- Choose your project
- Make sure your Data Source is Mapped correctly
- Select the folder you would like to import the Test into
- Click "Review Changes"
- Confirm that you are adding the new test and then hit Import

Step 2 - Review Imported Test Data Set Definition
- Open the test "Exercise 10: account_id is unique in account_data.csv" and review it's configuration
- Note that it is connecting to a Windows Directory and using the CSV File - Row Count Grouped by Column Macro to connect to the account_data.csv file in the .\CSV\CUSTOMER_1001 folder
- Note that the column specified to group by is account_id
- Click the Preview and Refresh Options to view the test dataset

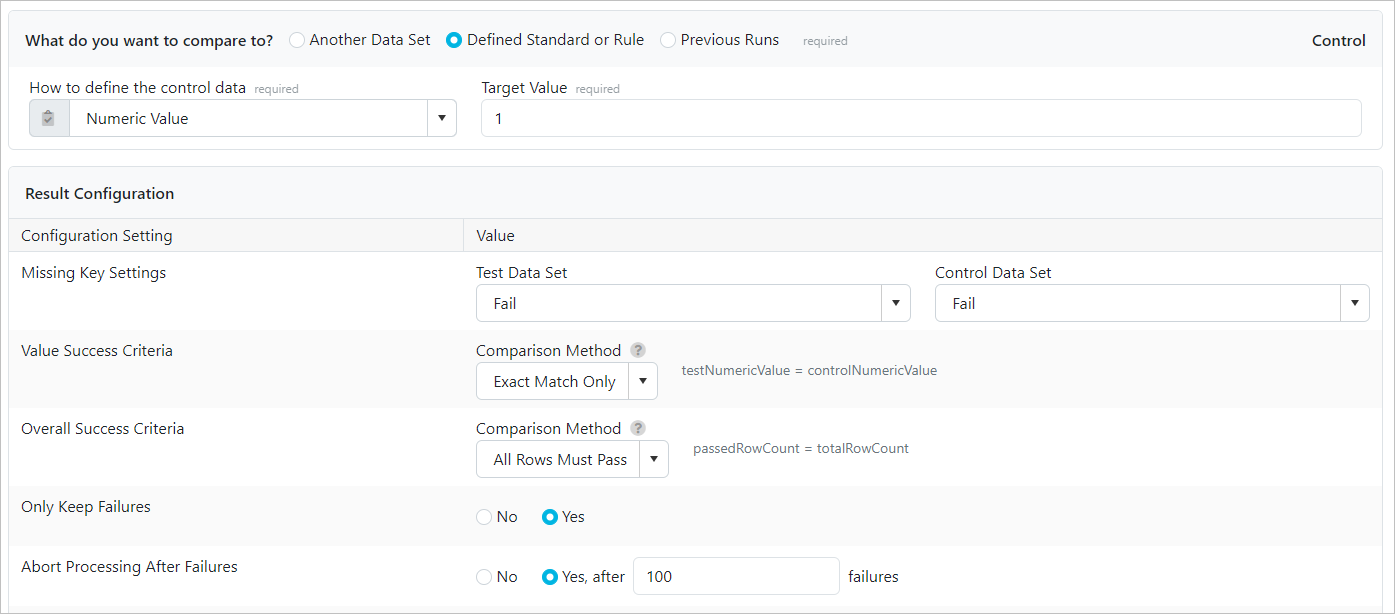
Step 3 - Review Control and Result Configuration
- Note that it is comparing the ROW_COUNT to a fixed value of 1
- Note that the Result Configuration is set so that only Failures are kept and to abort after 100 failutes are found
Step 4 - Convert to Template Test
- Scroll to the top of the test and click "Convert to Template Test"
- Note how the Test has replaced all references to account_data.csv with {{table.name}}.
- Also Note how the Target Object Type is "Table" (which in the case of files represents the file)

Step 5 - Update Test Configuration with logic to create appropriate column names
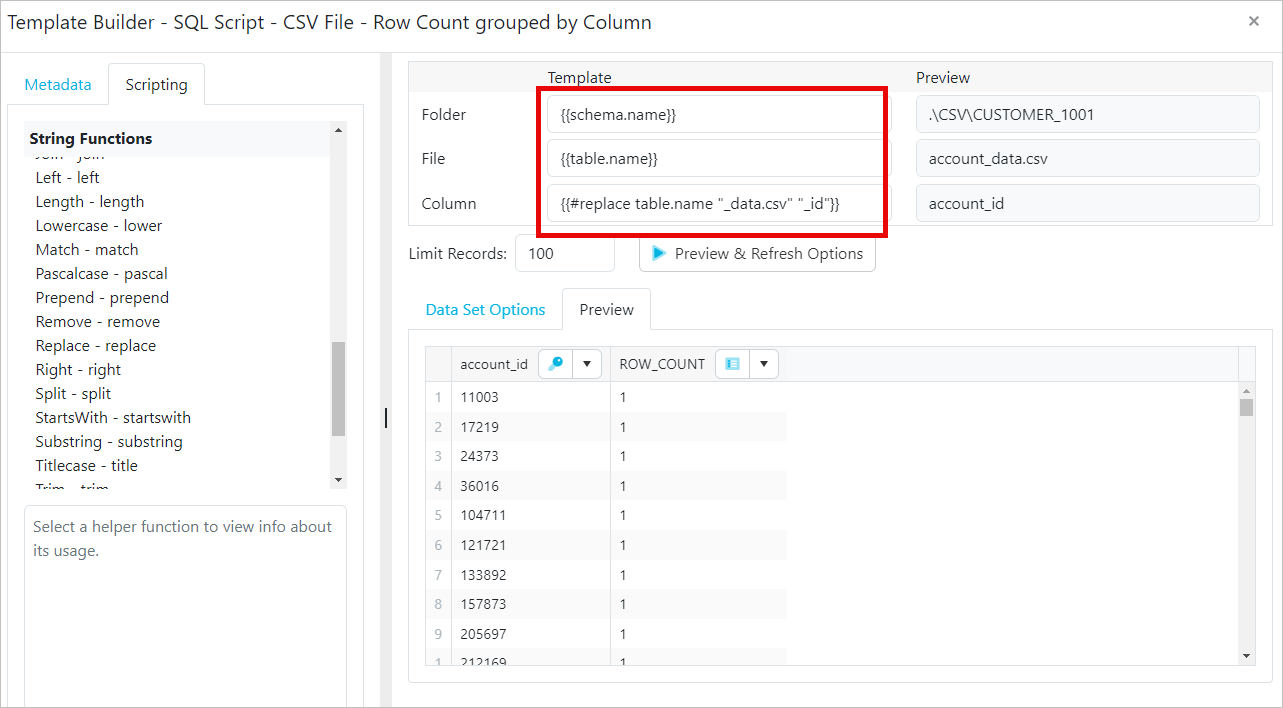
- Click Build Template
- Update the Folder input to {{schema.name}}
- Update the File input to {{table.name}}
- Update the Column input to {{#replace table.name "_data.csv" "_id"}}
- Preview and Refresh Options
- Update Template
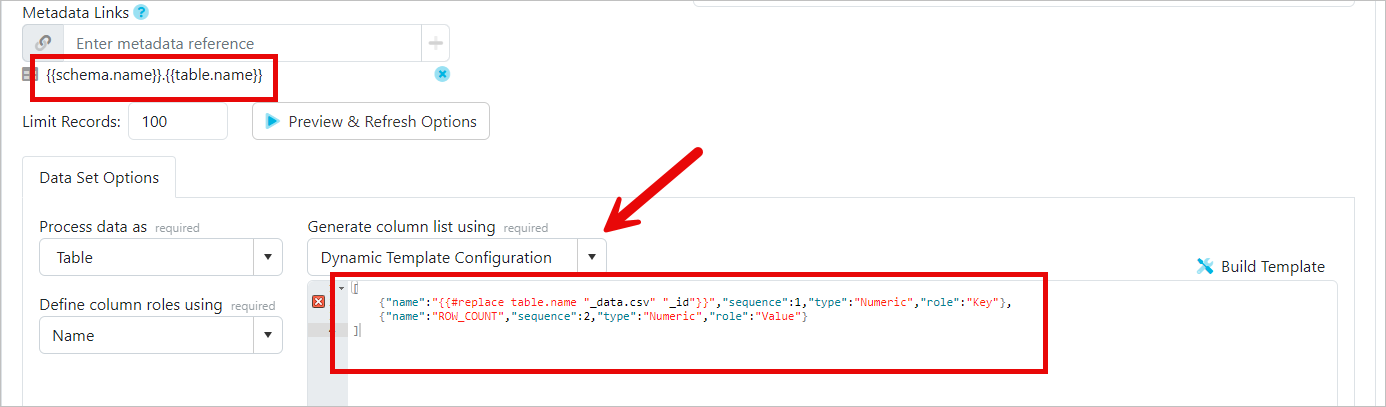
- Update the Metadata Links to {{schema.name}}.{{table..name}}
- Change the Generate column list using to Dynamic Template Configuration
- Update the Dynamic Script to:
[
	{"name":"{{#replace table.name "_data.csv" "_id"}}","sequence":1,"type":"Numeric","role":"Key"},
	{"name":"ROW_COUNT","sequence":2,"type":"Numeric","role":"Value"}
]
Step 6 - Configure Metadata Selection
- Switch to the Metadata Selection Tab
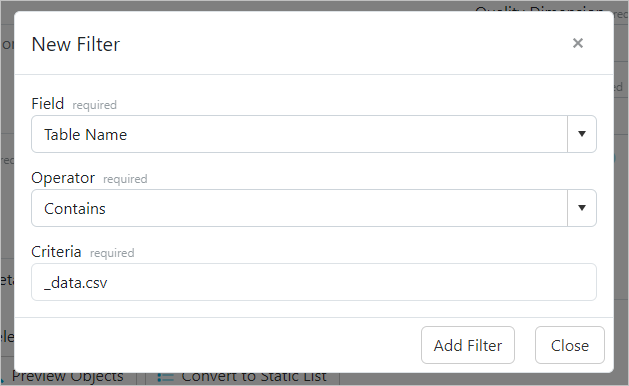
- Change to the "Use Filters" option
- Add a Filter on the Table Name Field contains to "_data.csv"
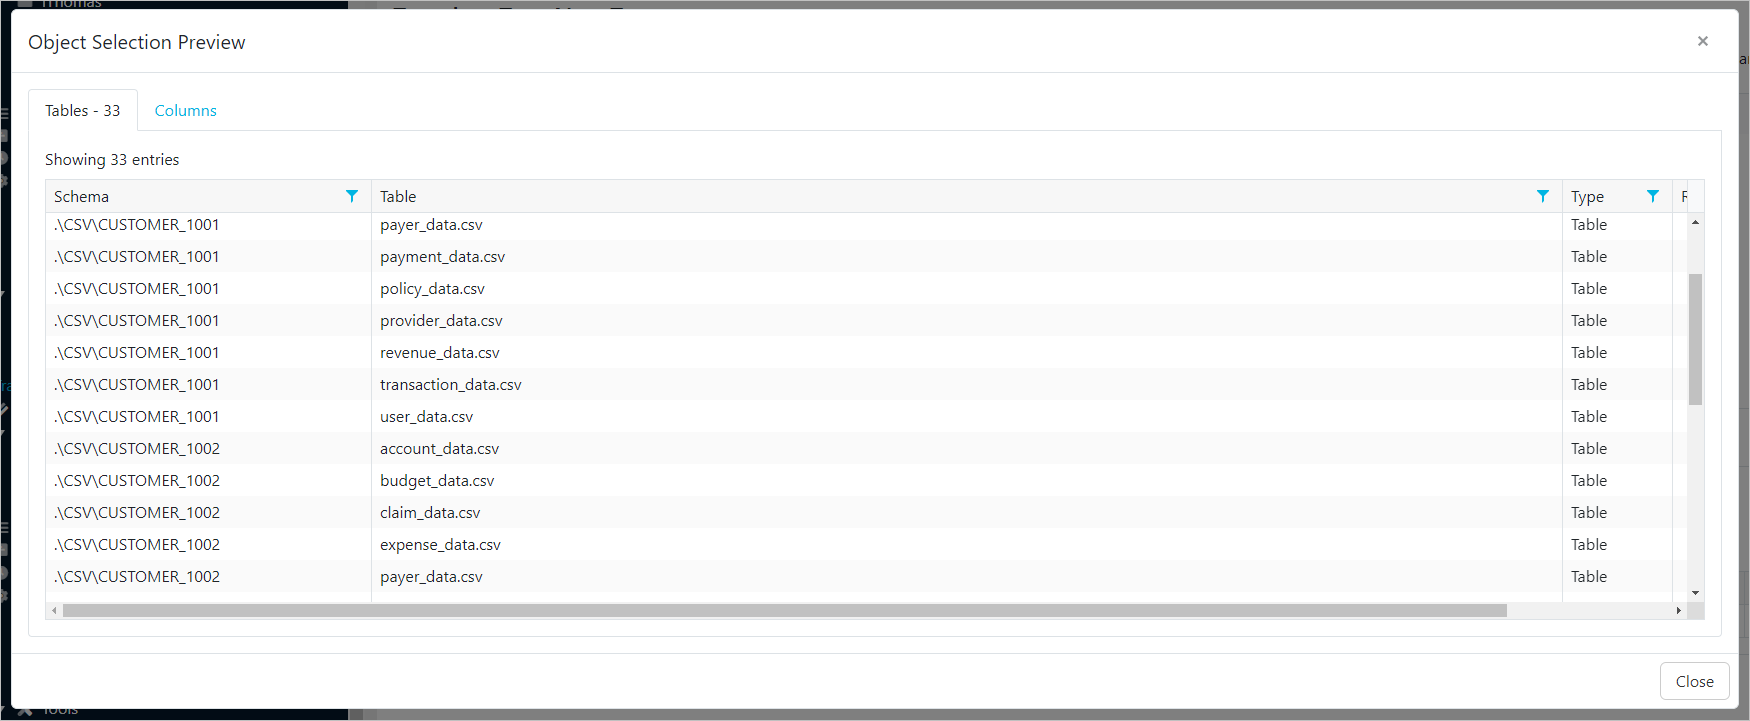
- Preview the objects and make sure that all the relevant files are included in the list.
Step 7 - Save -> Materialize -> Run
- Rename your test to "Exercise 10: CSV Unique ID Check"
- Save the test
- Materialize Child Tests
- Run Child Tests