Overview
Easily find tests, jobs, and metadata objects using the search bar in the menu header. Not only can you search by object name, but you can search by Data Source, the SQL script used in a test, who created a test, and more.
Prerequisites
There are a few steps to complete before Global Search can be used.
Install & Configure Apache Solr
Configure Global Search settings in Validatar
Search Bar Display
The search bar will not appear in the Validatar header if Global Search isn't configured.
Solr Install for Windows
1. Install Java
If not already installed,
Review system requirements for Apache Solr: https://solr.apache.org/guide/solr/latest/deployment-guide/system-requirements.html
Download Java from Adoptium, OpenJDK, or use an Oracle version
Install the downloaded MSI
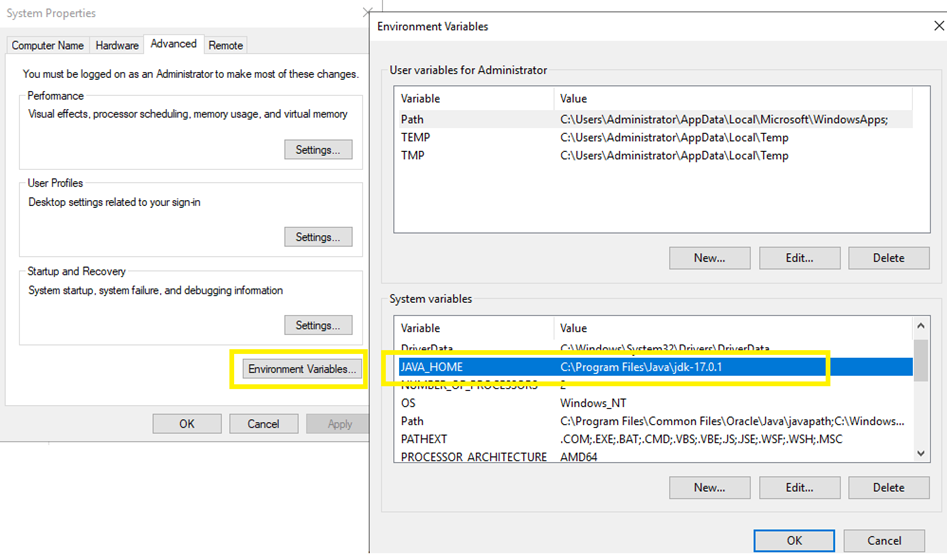
Create a JAVA_HOME system environment variable that references the root Java folder from the above install.
2. Install Solr
Solr License
Solr is distributed by Apache using the Apache License, version 2.0, which can be viewed here: https://www.apache.org/licenses/LICENSE-2.0.
Download Solr from here: https://solr.apache.org/downloads.html. Use the link for the latest binary release zip file (https://www.apache.org/dyn/closer.lua/solr/solr/9.8.1/solr-9.8.1.tgz?action=download)
Unzip the Solr file
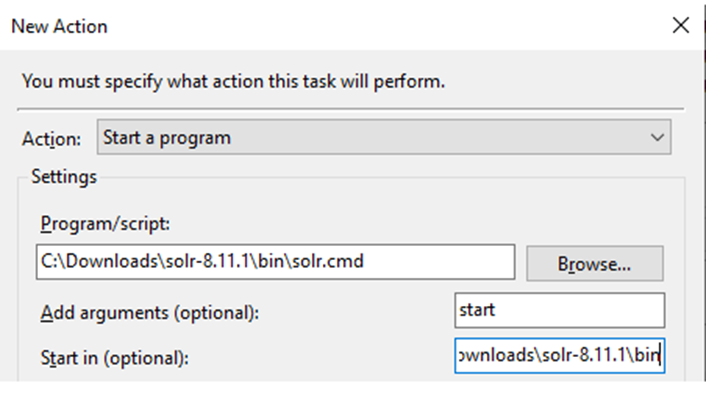
Open a command line prompt, navigate to the folder where you unzipped Solr, and start Solr using the following command:
bin\solr.cmd start

At this point, you should be able to open a browser on that server and navigate to http://localhost:8983 to open the Solr UI
Server Restart Note
This command will need to be run any time the server restarts, so you’ll probably want to create a task using Windows Task Scheduler with a trigger of “At startup”.
3. Add Validatar core to Solr
A “core” in Solr is where the data indexed by Validatar resides. If you’re using one instance of Solr for multiple Validatar instances (dev and prod), you’ll want to use a different core for each instance.
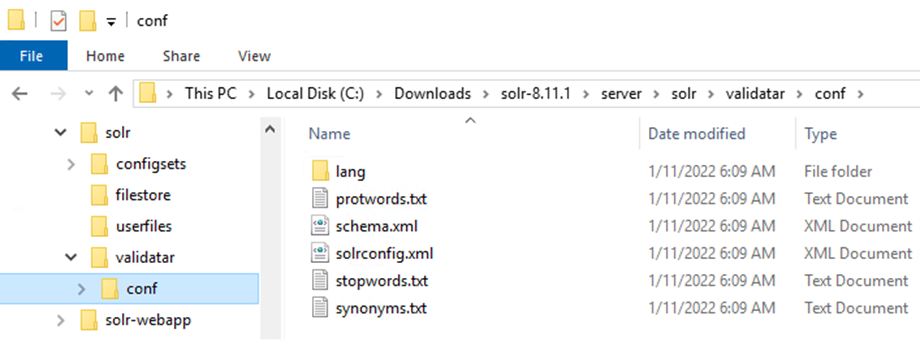
Create a "validatar" folder for the new core inside the Solr root folder. If you use a different folder name, replace any reference to "validatar" in this step and the following steps.
Download the following file: https://admin.cloud.validatar.com/assets/releases/2025-2/solr-root.zip
Copy the “conf” folder from the zip file into the “validatar” folder. The folder should look like this:
Open a browser on the server and navigate to: http://localhost:8983/solr/#/~cores
Enter “validatar” in the name and instanceDir text boxes, then click the “Add Core” button
Configure Global Search in Validatar
Open a browser and navigate to Validatar
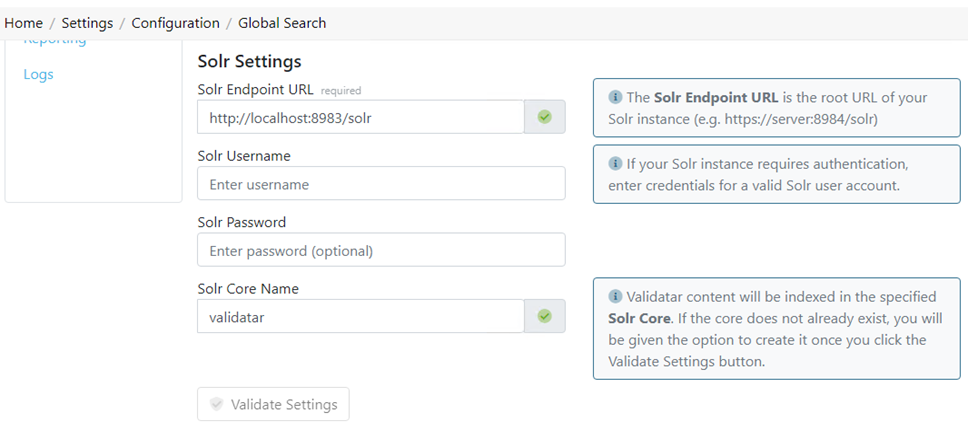
Go to Settings > Configuration > Global Search
Enter http://localhost:8983/solr in the Solr Endpoint URL textbox and “validatar” in the Solr Core Name textbox. Leave the username/password fields empty.
Click the Validate Settings button to verify that everything is configured correctly. If everything is valid, you’ll see two green checkboxes
Scroll up and check the Enable Indexing box, then click the Save button at the top.
After a few seconds, Validatar will start indexing data. You can see the indexing progress by clicking the refresh button to the right of the Indexing Statistics heading.
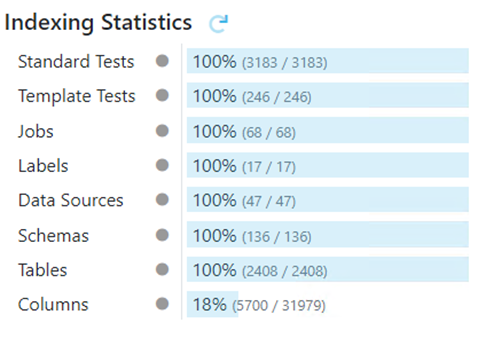
Indexing Statistics Note
The indexed objects include archived and disabled objects in the Validatar Database.