Overview
The Import feature allows an XML file that contains the contents of a project to be imported into another project. Importing is a three-step process:
- Step 1: Select a file
- Step 2: Map the data sources and choose the target import folder
- Step 3: Review the changes
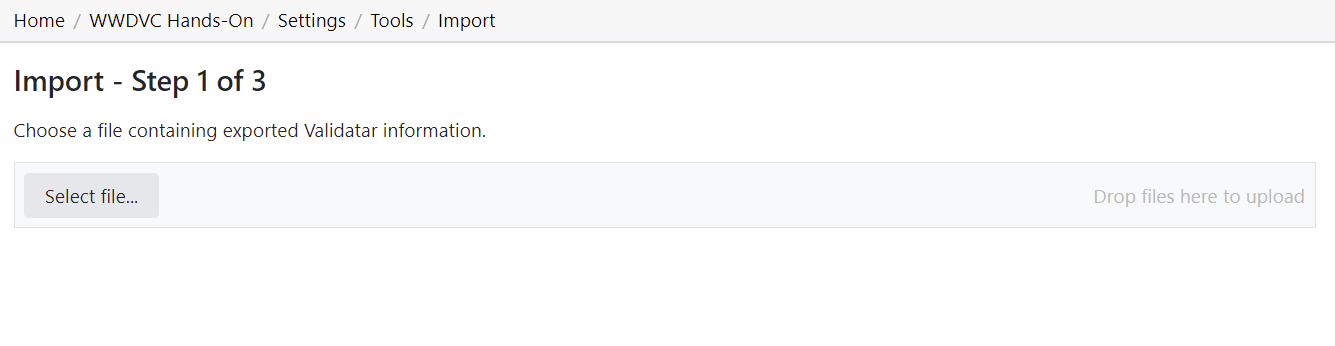
Import: Step 1
Select an XML file containing exported Validatar objects. Invalid file types and XML files incorrectly structured will not be accepted. To ensure you have the correct file to import, export objects from Validatar first for reference.
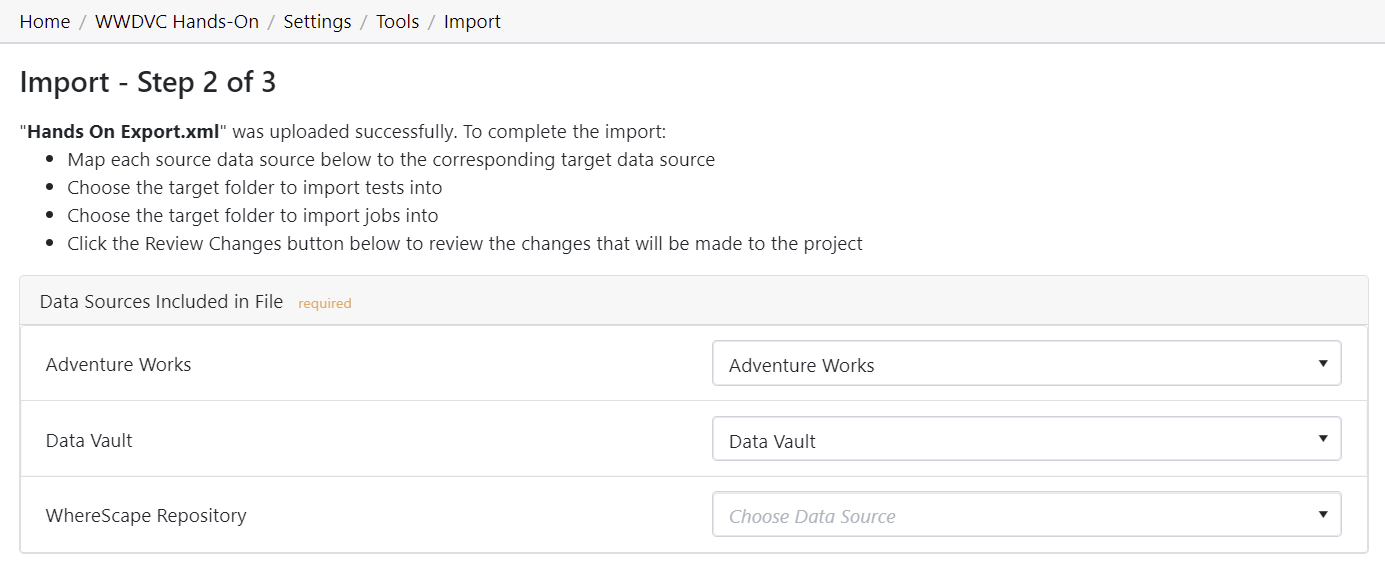
Import: Step 2
Mapping Data Sources
If a data source in the project you're importing into has the same name and connection string as a data source found in the imported XML file, the data sources will automatically be mapped to each other. This default mapping can be changed if necessary.
For data sources where an identical name and connection string is not found, you will have to choose the respective data source.
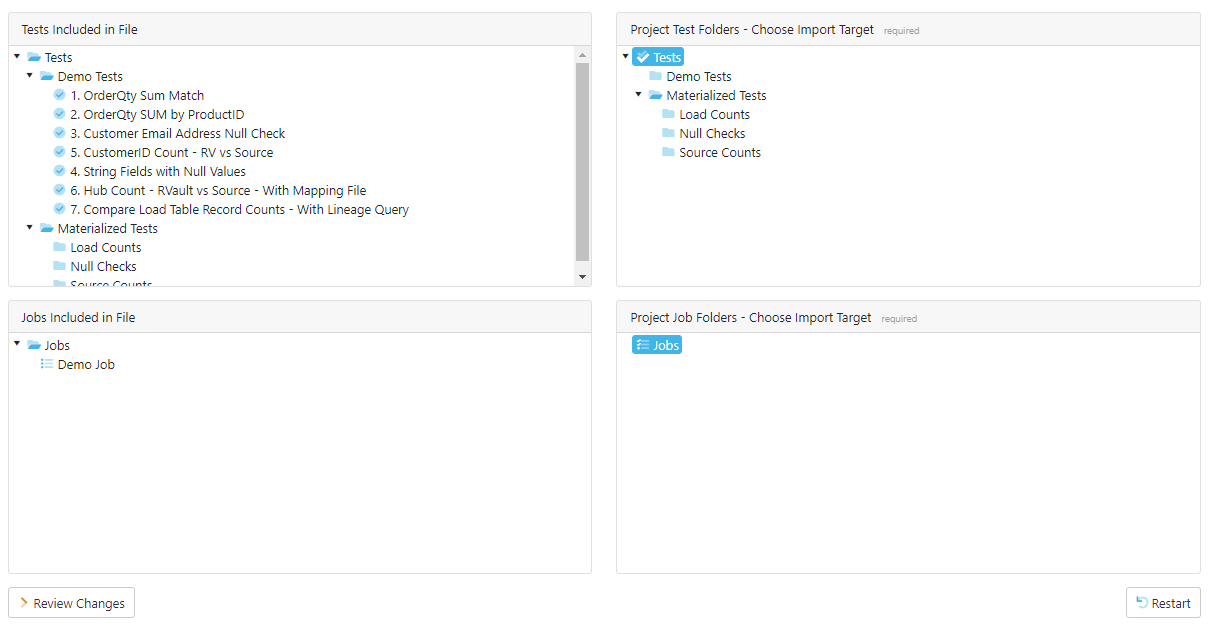
Choosing the Target Folder
All the tests and jobs included in the file will appear on the left pane. Choose a single folder on the test and job levels to import every object included in the file. After the selection is made, click Review Changes.
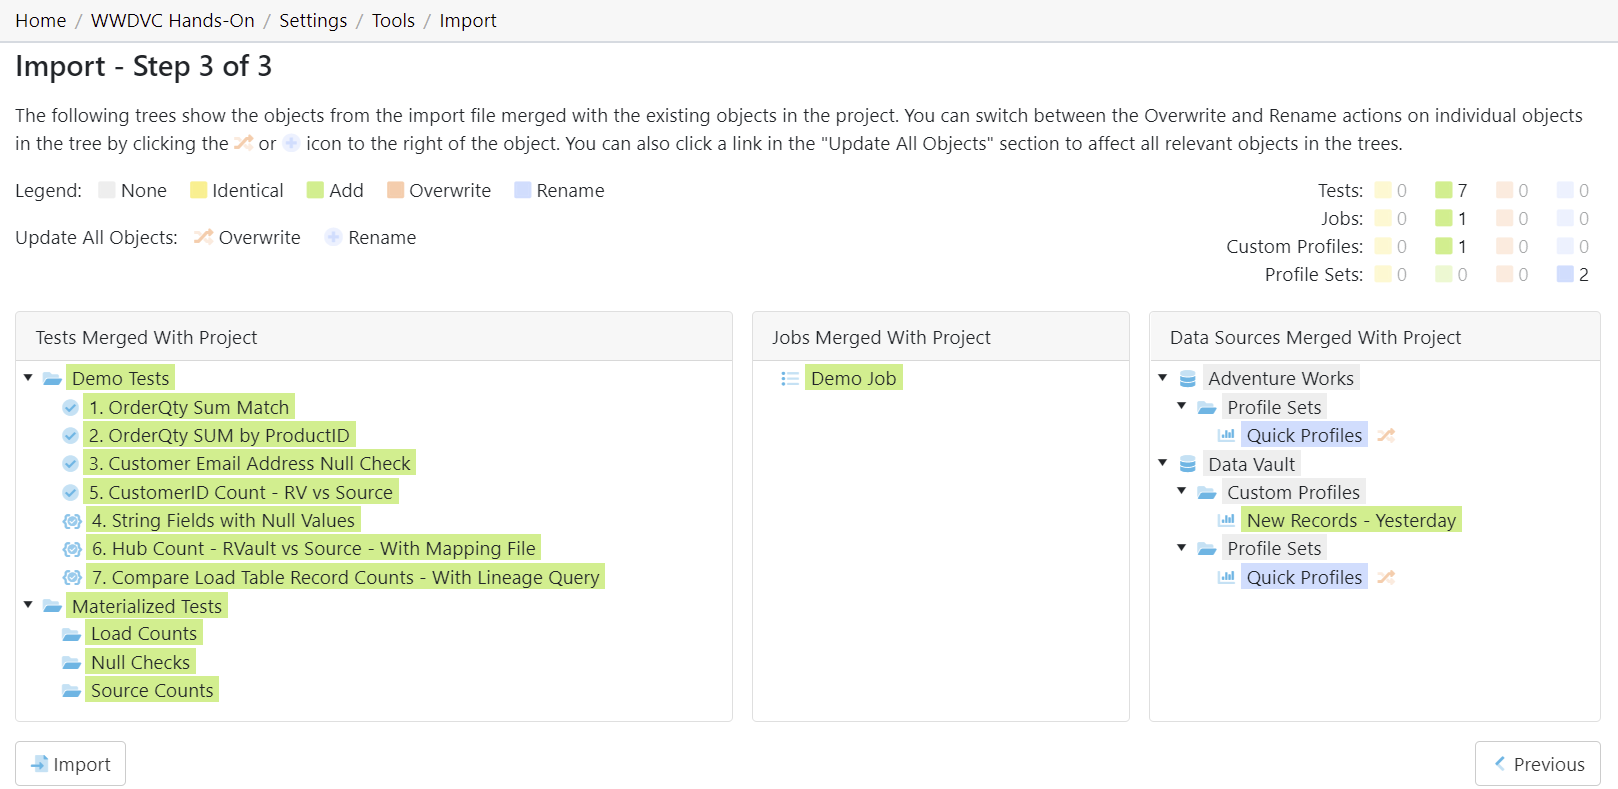
Import: Step 3
The final step of the import is to review the objects that will be added to the project. Each object is highlighted based on whether the object currently exists in the project or will be added.
- Identical - The object already exists in the current project. This requires the user to either overwrite or rename the object.
- Add - The object does not exist in the current project and will be added.
- Overwrite - If the object already exists, replace it with the new object by overwriting it.
- Rename - If the object already exists, duplicate the object and rename it.
To toggle between overwrite and rename, click the icon next to the object.
Finalizing the Import
Once you review all changes to be made to the project, select Import. Navigate back to the Tests and Jobs area to confirm the import was successful.
Access
1. Navigate to Tools found under Project Settings.
2. Select Import.